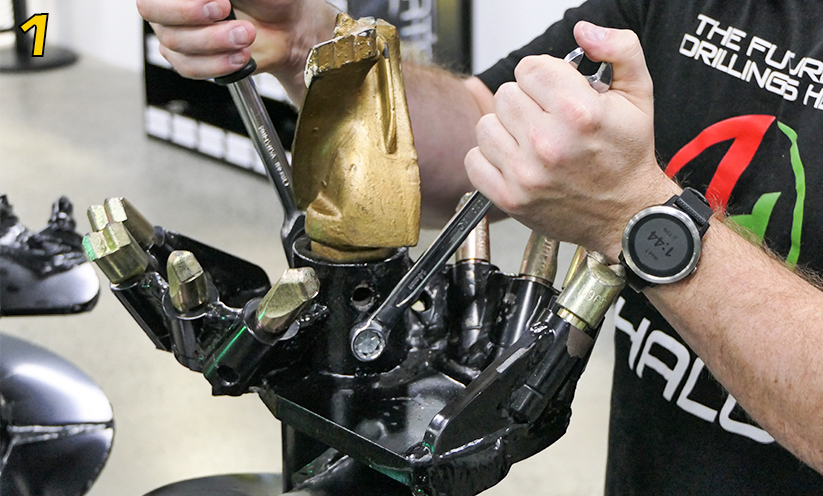
How To Replace Tapered Auger Teeth (Earth/Rock Combo Augers)
Our Digga tapered auger teeth are defined by their tapered shape and are used on our earth/rock combo range of augers (RC).
Tapered teeth will wear most on the edges above the carbide tip. You may notice the teeth scalloping out around the edges and forming a crease around the tooth. Please remember that it becomes essential to change the tooth as soon as you notice the carbide tip is either gone, chipped, damaged or cracked.
If you notice excessive wear on a single tip carbide tooth and its pocket – we recommend replacing it with a double tip carbide tooth.
Removing Tapered Auger Teeth
Tapered auger teeth are found on our earth/rock combo augers. Follow these first steps to remove them.
1. Place a pin punch or centre punch in the hole at the base of the tooth holder.
2. Ensure the rounded side of the punch is facing the bottom of the pocket and the flat side against the base of the tooth.
3. Use a hammer to tap the punch into the hole to dislodge the tooth.
4. Remove the tooth.
Installing Tapered Auger Teeth
Once removed, clean the pocket and follow the steps below to change the teeth.
1. Position the auger so the cutting head is easily accessible. Secure it in place, to ensure it cannot fall.
2. Place the teeth in the pockets ensuring the ridge of the tooth aligns with the ridge of the pocket.
3. With the auger tooth placed in the pocket, knock the tooth in with a soft head mallet until the ridge of the tooth is past the top of the pocket’s ridge. Using a standard hammer will shatter the tungsten tips.
4. Ensure all teeth are secured tightly before starting to drill.
CORRECT WAY OF INSTALLING TAPERED AUGER TEETH
Note, that the following configuration of double and single tip teeth, as well as the depth and direction need to be considered too.


Comments
Post a Comment